There are five types dimension styles used on drawing.
- Parallel dimensioning
- Chain dimensioning
- Superimposed running or progressive dimensioning
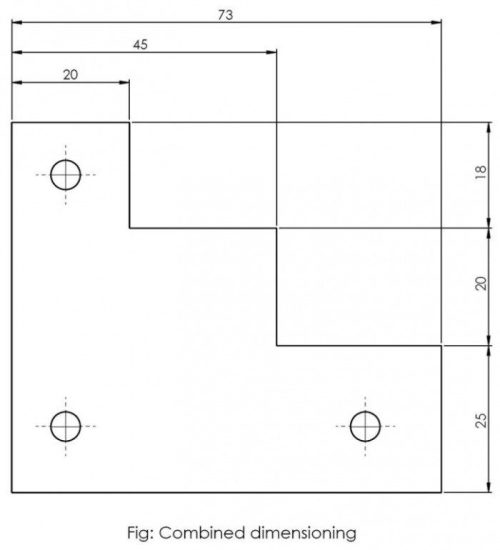
- Combined dimensioning
- Coordinate dimensioning
1. Parallel dimensioning:
When numbers of dimensions are measured in the same direction from a common feature, i.e. surface of the part, then method of indicating all the dimensions from the same feature is called parallel dimensioning. The dimension lines are parallel to each other and equally spaced.

2. Chain dimensioning:
Chain dimensioning is when each single dimension is placed directly adjacent to the next dimension without any gap between dimensions line.
This method should only be used if tolerance accumulation is not going to affect the function of part.

3. Superimposed running or progressive dimensioning:
The parallel dimension will not be practicable when the short of space. In such cases the dimensions can be used by the simplified method of superimposed running dimensioning.

4. Combined dimensioning:
If required, it is possible to combine superimposed running dimensioning, chain dimensioning and parallel dimensioning on one single drawing.

5. Coordinate dimensioning:
Dimensioning by a coordinate table can be used in place of other dimensioning styles. This can make drawing easier to read, when the part would have many dimensions when drawn to the other dimensions styles. A good example of using coordinate would be for a plate that has many holes in it, dimensioning with other dimensions styles might make the drawing look overly cluttered.


